Archive for the Category » Clip Art «

Believe…

Girl With A Shell

Girl With A Shell

Hello! Happy Monday!

Today’s card was inspired by Vera’s card (Isn’t her little girl adorable!). I knew what I would try to find on Google for free image clip art. The idea to use a clip art in the cards belongs to Allison. Thank you again, Allison! I just typed the words “free clip art” and the first link was a good source. To give some interest to the image, I decided to do paper piecing technique.

To put card together I used Claudia’s sketch. As I was telling you before I love Claudia’s blog so much! She is not only a wonderful crafter, but also very kind and thoughtful lady. Thank you Claudia for bringing joy in our lives with your beautiful cards.

The other fun thing I tried on this card was a Paper Napkins Transfers. Vera send me this link to Michelle’s Rubber Room and I was inspired to try this technique! Michelle has so many interesting tutorials! Her blog is very creative and very beautiful! She is always trying something new and shares her new projects with us! Thank you, Michelle for sharing your talent with us! Thank you to my friend Vera for being my friend!

Back Of The Card

Back Of The Card

I enjoyed doing this card! So many wonderful people helped me in it: my dear readers and visitors (you always inspire me to try something new), my husband (who gives me a big support for doing all of this), my friend Vera, Michelle, Allison, Claudia!

Thank you to all of you!

I am so lucky to have all of you!

I just wanted to tell you – Dream, Believe! Dream big and small, like this girl, listening to the wind in the shell. May be she dreams that one day she will see an ocean, or may be she dreams about traveling on a big ship with the lilac sails and her captain…

Enjoy your day,

I will see you soon,

Elena

Здравствуйте! Доброго Вам понедельника!

Открытка, которую я хочу вам сегодня показать, была создана под впечатлением открытки Веры. Когда я увидела открытку Веры, я знала что я буду искать на Google. Идея использования клип арта в открытках принадлежит Allison. За что огромное спасибо Allison. Я напечатала слово “бесплатный клип-арт” на английском и первая ссылка оказалась очень полезной. Чтобы придать интерес этой симпатичной девочке, я распечатала ее на разных бумажках, вырезала их и приклеила (платье, сама девочка, песок). Немного напоминает аппликацию.

Для того, чтобы сложить открытку в единое целое, я воспользовалась скетчем от Cladia’s sketch. Я Вам уже говорила, что мне очень нравится блог Pretty Pressings. Claudia не только талантливая рукодельница, но и очень добрый  и отзывчивый человек.

Еще хочу Вам рассказать, что я попробовала новую технику по Декупажу Салфеток. Верочка прислала мне ссылку на блог Michelle и, конечно, я решила попробовать эту технику. Mischelle’ blog просто чудо! Сколько интересных мастер-классов и очень красивых работ! Она постоянно пробует что-то новое и всегда делится своими новыми впечатлениями и открытиями в мире открыток. Спасибо большое Michelle за Ваш талант и красивый блог и Вере за дружбу со мной (вообще я очень противная и вредная, потому дружба со мной, ой как нелегка)!

Я получила огромное удовольствие, делая эту открытку. Столько замечательных людей помогли мне в этом – Вы – дорогие мои читатели и посетители, мой муж (ох, что бы я делала без него), Верочка, Claudia, Michelle, Allison!  Спасибо Вам всем, мои хорошие!

Боже, как мне повезло, что Вы у меня есть!

И ещё – мечтайте, верьте в чудеса! Не важно какие мечты – маленькие, большие… Как эта девочка… Кто знает о чем она мечтает? Может об океане, которого ни разу не видела, а может о капитане на корабле с алыми парусами, как Ассоль…

Supplies for the card: clip art, paper napkin, plastic wrapper, colored card stock, ribbon, eyelet, twine, word stamp from Inkadinkado, DP from K& Company, printed paper from DCWV, foam tape

Anna and Allison inspired me…

For A Special Mom

For A Special Mom

Happy Tuesday to everybody! Thank you for the nice comments and for visiting me!
As you all noticed I decide to change the layout of my blog. Simply decided to try something new. Just for a change. I wanted to put all the blogs that I love in one folder “Friends”, but the format of this file is so limited… so I put it in two folders. I don’t want you to feel that I love some of you less or more – you are all my favorites. It is just a weird computer thing. My husband will help to figure out how to make it work in nicer way.

Доброго всем Вторника! Хочу поблагодарить всех за добрые комментарии и за то, что приходите ко мне в гости! Вы, наверное, заметили, что я немного изменила внешний вид блога. Просто захотелось чего-то новенького. На боковой панели я пыталась разместить все блоги, которые мне нравятся, но размер файла ограничен, поэтому пришлось разбивать на 2 группы. Я никого не хотела обидеть – Вы все для меня дороги и я дорожу каждым из вас! Муж мне обещал помочь, как разрешить вопрос со всеми этими компьютерными премудростями!

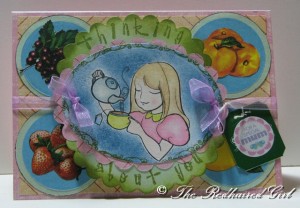
Now to the card! When I saw Anna’s Snowman, I got an idea in my head! Isn’t her snowman is so cute and sweet! Believe or not, Annapurna used tea packing to make his gloves and scarf!

My mom sent me lots of tea, they all in small paper bags with a very nice design on it. I always keep everything that I would think I could use, and this one especially because it is from my Mom. I cut the picture  (fruit or berry – taste of the tea) out of the tea paper bag and attached to the paper. When I finished all of the 4 pictures, I put them on a table and thought that something is missing. Of course, I need a character to this card. And you know who helped to solve this problem? Allison and her great tutorial about clip art. I found this cute little girl and following the tutorial made it black and white. I just love it!

Thank you very much to Allison and Anna! There is an expression: one head is good, but two better! In my case it is three heads!

I am going to send this card to my mom and write how much I love her…

Ну, а теперь я хочу поделиться с Вами историей создания моей открытки. Когда я увидела чудесную открытку со снеговиком, то мне в голову пришла идея! Хотите верьте, хотите нет, но Annapurna сделала эту открытку с использованием упаковки из-под чая! Да-да, варежки и шарфик! Правда здорово!

Моя мамочка как раз прислала мне чай “Фруктовая линия”, где на каждом пакете указан не только аромат чая, но и картинка есть. Я вообще люблю хранить и собирать всякие разные фантики и бумажки, а здесь вообще случай особый – чай-то от мамы! Вырезав фрукты-ягоды и наклеив их на бумагу, я подумала что чего-то не хватает… Ну, конечно, чай есть, а кто его будет пить? И тогда я вспомнила Allison и её замечательный мастер-класс. В клип арте я нашла картинку, и следуя инструкциям Allison, получился вот такой персонаж. Когда открытка обрела жизнь, я долго не выпускала ее из рук. Удивительно, но мне она самой очень понравилась! Вот всё же не зря говорят, что одна голова хорошо, а две лучше! В моём случае три!

…Отправлю открыточку мамочке и напишу, как сильно я ее люблю…

That is all for today! Thank for stopping and sharing with me your time! I appreciate all your time and nice comments! You always make my day!

Hugs,

Elena

Спасибо Вам, что заглянули ко мне! Очень ценю Ваше время и все пожелания!

P. S. Isn’t it’s great that somebody create a word “blog” and all related words to this.  Just 4 letters, but how many friends you can make and how much you can open for yourself … just a thought!

Supplies I used: regular card stock, patterned paper from DCWV, circle Nestabilities, tea bag holders, ribbon, clip art, Prisma colored pencils, OMS, glitter pen, clear dollar stamps (words), sticker and ribbon

You Never Know Until You Try

Wreath ClassHello and Happy Thursday! Today I have so much to show you! I have several sewing projects, one card and one wreath.

Здравствуйте и доброго Вам дня!

Сегодня мне бы хотелось Вам показать мои последние работы – кое-что из того, что я сшила, одну открыточку и венок-украшение из засушенных растений.

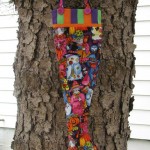
First I will start with the wreath. On Tuesday my friend Julie called and asked if I am interested in a craft class on making a wreath. I told that I never did it before, but she said that it is all right, you never know until you try! So we went last night to the farm where this class was hosting. It was very-very interesting! I had a very good time with excellent company. I think my wreath doesn’t look too bad for the first time! What do you think? After this class my friend Julie invited me for a cup of a tea. We had a very good time together.

Сначала я расскажу о композиции из сухоцветов. Во вторник ко мне позвонила моя подруга Julie и предложила мне посетить ферму, где будет проводиться мастер-класс по изготовлению различных композиций из засушенных растений. Я этим никогда не занималась, но моя подруга уверила меня, что всё получится. Ведь я же не пробовала, как я могу знать получится или нет? Мне безумно понравилось в этом классе, компания девушек подобралась очень дружелюбная. Я узнала очень много нового и в процессе познавания получилась вот такая поделка. Думаю, что для первого раза неплохо!

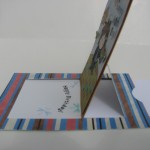
Clip Art CardAnother thing I made yesterday is a card. It is not just a card. It is a magic wallet card! I made it for my fiend’s son birthday. To put money inside I thought would be boring… I was thinking, thinking and after searching on Google, found a great tutorial Japanese Magic Wallet. The instructions are so easy and the result is like magic! I made a little video with my son to show you this card in action. Sergei liked it a lot!

А теперь перейдём к открытке. Это не просто открытка. Это волшебный кошелёк. Я сделала эту открытку-кошелёк сыночку моей подруги. Просто положить деньги внутри открытки показалось мне скучным, и тогда после долгих раздумий и поисков на Гугле нашла мастер-класс по изготовлению волшебного кошелька. Инструкция очень простая, картинки очень наглядные. Мы записали на камеру как работает эта открытка. Сережке очень понравилось играть с этой поделкой.

As you can see on the card there is the cutest boy with a skateboard. I thank you Allison for her terrific idea with clip art. I think it is a revolution in card making! Some people can’t afford to buy all the stamps they like, and clip art is a wonderful alternative for this! Thank you Allison so much for sharing this idea! I colored the clip art image with Prisma pencils and OMS. For the title I used the stickers.

Подробнее хотелось бы рассказать о симпатичном мальчике со скейтбордом в руках. Это не штампик, это клип-арт! За эту идею я благодарю Allison. Я считаю, что это целая революция в мире изготовления открыток. Не всегда мы можем себе позволить купить понравившийся штампик, тогда на помощь приходить клип-арт. Мальчишка был разукрашен с помощью цветных карандашей Призма (Prisma) и специальной жидкости для растушовки карандаша. Для заглавия на открытке использованы наклейки.

The last for today’s show is sewing. I made more witch boots and a bag. I was thinking about sewing something to sell. This way I can have some extra for my craft supplies. I need your advice, My Friends! Do you think it is worth starting to do it? And how much do you think I can sell it for? I would appreciate every advice I can get! I am working on another purse now. When I will finish it I will post a picture on my blog.

Boot 1Boot 2

Bag InsideBag

Ну и напоследок мои последние работы с тканью. 2 ведьминых сапожка и сумочка (очень простая). Вы, знаете, мне бы хотелось услышать вашего совета. Я решила попробовать шить и продавать сумочки, может и ещё что-то, чтобы хоть как-то помочь себе в приобретении товаров для рукоделия. Как Вы думаете, стоит начинать, и если стоит, то насколько оценивать свои работы? Буду очень благодарна любому совету!

Now back to sewing! I thank every body for stopping by and spending some time with me!

Have a nice day,

Elena

Ставлю точку на сегодня и возвращаюсь к своему шитью! Спасибо за то, что зашли ко мне в гости! Хорошего Вам дня!

Supplies for the card: cereal box, DP from DCWV, clip art, Prisma colored pencils, OMS, brads, stickers, cardstock, dye-based ink from SU for sponging around the edges, ribbon

Hello! I hope you had a wonderful weekend and enjoyed the fireworks!

In a place where I live we had a fantastic fireworks display. I was surprised! We had lots of fun!!!

Birthday Boy Open 2Today I would like to show you a card that I just made. It’s a birthday card. I used a clip art image from the very talented Allison’s blog. I think she had a birthday last weekend. Happy Birthday Allison!!! Wish you all the best! I paper pieced some of the details (pants, jacket, shirt) and colored a boy with regular pencils and baby oil. Then I took a piece of a watercolor paper and brushed over it with blue watercolor paint. I saw this idea in a very inspirational Hero Arts blog. I love this blog and their stamping art a lot! Their tutorials are so helpful! I’ve learned a lot from them. Their cards are very artistic!!! For making my card I used this tutorial by Jennifer! Thank you Jennifer! I really enjoyed doing it. All of the wonderful ladies on this blog are so talented and their cards are just gorgeous! By the way my son likes to watch their video tutorials!   He told me one day: “Mom, they are awesome!!!” I also added some punched butterflies and a little branch with a birdhouse. I stamped a word “happy birthday’ using different stamp sets.

Birthday Boy Card Flat Birthday Boy Card Side Birthday Boy Open 1

I hope you had a good time reading through my blog!

Thank for stopping by!
See you tomorrow!
TheRedHairedGirl

Supplies for the card: cardstock, designer paper from DCWV, clip art, dollar stamps, butterfly punch from Fiskars, ribbon, circle punch, watercolor paper, colored pencils, baby oil, watercolor paint, water brush.

Hello to Everybody!

I would like to thank Connie, Carol, Heather, Ida, and Sue for the nice comments on my blog! I was very glad to see you here! That’s really helped me to feel better about my card and it gave me so much inspiration! It is nice to hear warm and kind words from people about stuff you make.

Clip Art Card 1My card that I want you to show was very fun to do. I made it for my friend to wish her a safe trip to Odessa for her vacation. One day I saw a very interesting post on Allison’s blog about using Microsoft Clip Art. I found it very interesting and decided to try. Her tutorial is very helpful and helped me a lot. Allison has done great work on creating the whole gallery of cute girls and boys. She shared all of the images she found. Thank you Allison! Check her blog out and you will like them too.

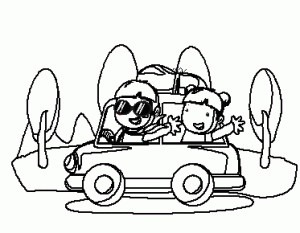
I found the image for the card and made it black and white following the step-by-step tutorial by Allison. I printed the image on watercolor paper and then colored it using my watercolor pencils. Then I cut it out… I looked at this little car image and a little light bulb turned on in my head. I had an idea about how to make this car move. I remembered a very cute pull-tub gift cardholder that I saw on Nichole Heady’s blog made by Molly. It’s an amazing card. Molly wrote a tutorial about how to make this card. She mentioned that it was her “first attempt to explain anything in depth.” Molly, thank you very much for your wonderful tutorial. It was so easy to follow all your directions. She has done a great job. For my card I changed the size for the insert and added a little detail (road sign) so it will be like a little tab to pull the car.

Clip Art Card 2For making clouds on my card I used a tutorial that I found on Jessica’s blog. I found her blog through Google search. When I don’t know how to do something, I just go on Google and type the key word. This time it was “cloud tutorial.” I usually do an image search. This way you can find new creative blogs to educate yourself. Jessica has so many interesting ideas and lots of tutorials. I was amazed by her creativity of how to make a masterpiece from a dollar store item. That is unbelievable! Great job!!!

Clip Art Image

I hope that you found something interesting today as I find each day from other creative people!

Thank you for stopping by and I will see you soon!

Supplies for the card: card stock, clip art image, water colored pencils, dye-based ink, sponges, letter stamps, glue dots.